오랫만에 깃허브에 push 좀 하려고 했더니 계속 인증 실패가 나네요 ㅜㅜ.
오류 메시지를 보면 2021.8.31 부터 패스워드 인증이 없어졌다고, 개인 토큰을 대신 사용하라는 내용입니다.
Support for password authentication was removed on August 13, 2021. Please use a personal access token instead.
그래서, 깃허브에서 토큰 발급 받아 소스트리에서 인증하는 방법을 공유합니다.
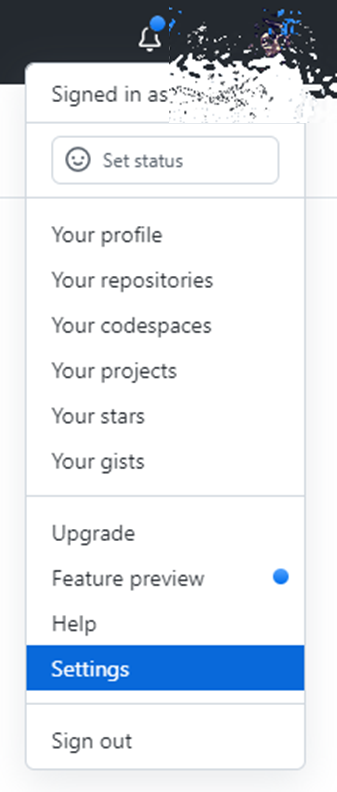
1. 깃허브 로그인 하시면 우측 상단에 프로필이 나타납니다.
프로필을 눌러서 아래와 이미지처럼 Settings 메뉴를 선택합니다.
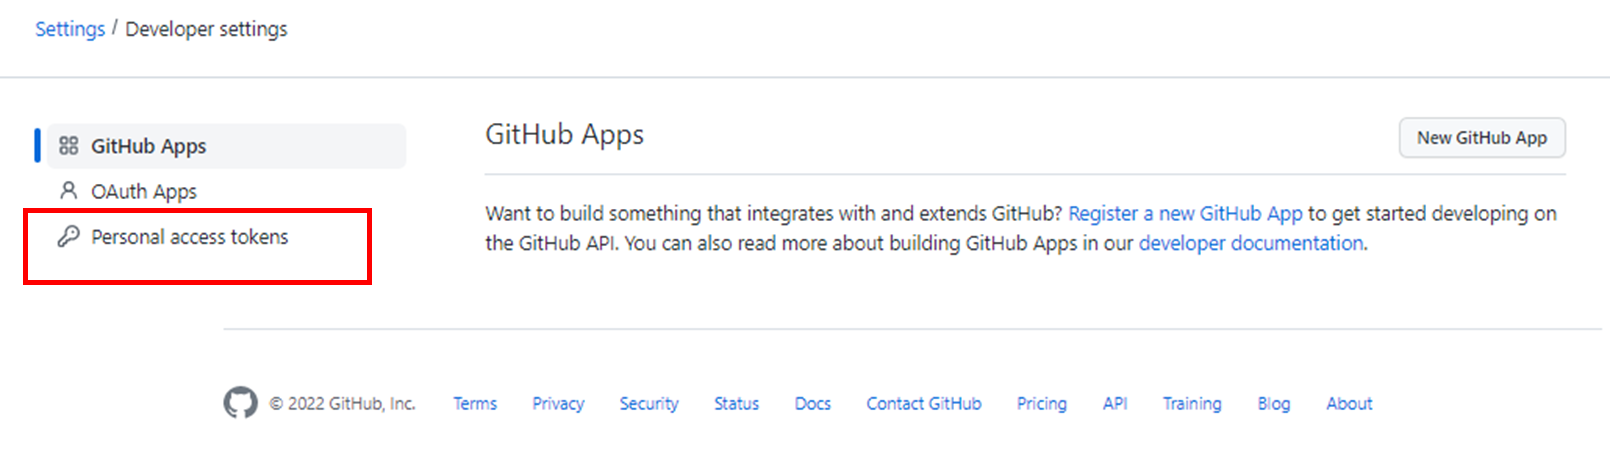
2. 프로필 화면으로 이동화면 왼쪽 메뉴에 "Developer settings" 가 있습니다. 클릭합니다.
- 프로필 화면 URL : https://github.com/settings/profile
GitHub: Where the world builds software
GitHub is where over 73 million developers shape the future of software, together. Contribute to the open source community, manage your Git repositories, review code like a pro, track bugs and feat...
github.com

3. 개발자 설정 화면에서 "Personal aceess tokens" 메뉴를 클릭합니다.
- 개발자 설정 화면 URL : https://github.com/settings/apps
GitHub: Where the world builds software
GitHub is where over 73 million developers shape the future of software, together. Contribute to the open source community, manage your Git repositories, review code like a pro, track bugs and feat...
github.com
4. 개인 접근 토큰 화면에서 "Generate new token" 버튼을 클릭합니다.
- URL : https://github.com/settings/tokens
GitHub: Where the world builds software
GitHub is where over 73 million developers shape the future of software, together. Contribute to the open source community, manage your Git repositories, review code like a pro, track bugs and feat...
github.com

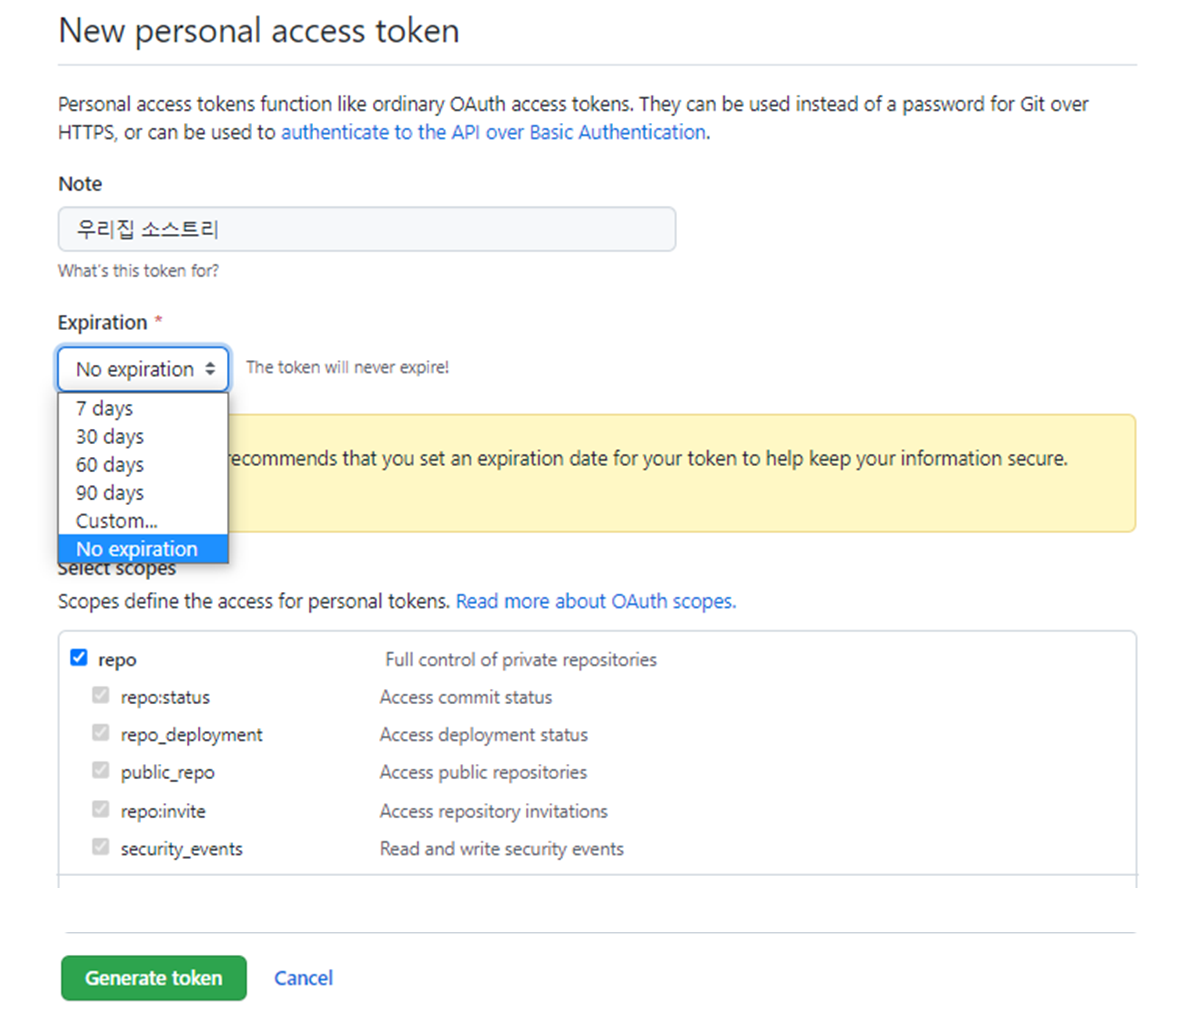
5. 토큰 생성 화면 입니다.
- URL : https://github.com/settings/tokens/new
GitHub: Where the world builds software
GitHub is where over 73 million developers shape the future of software, together. Contribute to the open source community, manage your Git repositories, review code like a pro, track bugs and feat...
github.com
- Note 항목에 토큰 이름을 입력합니다.
- Expiration 항목은 토큰 유효기간 입니다.
- Select scopes 에서는 github 여러 기능들을 선택적으로 권한을 줄 수 있습니다. 보통은 그냥 repo 만으로도 충분합니다.
- 설정이 끝나면 맨 아래 "Generate token" 버튼을 클릭합니다.
6. 토큰이 생성 되었습니다. 해당 토큰을 복사 버튼을 클릭해 복사합니다.
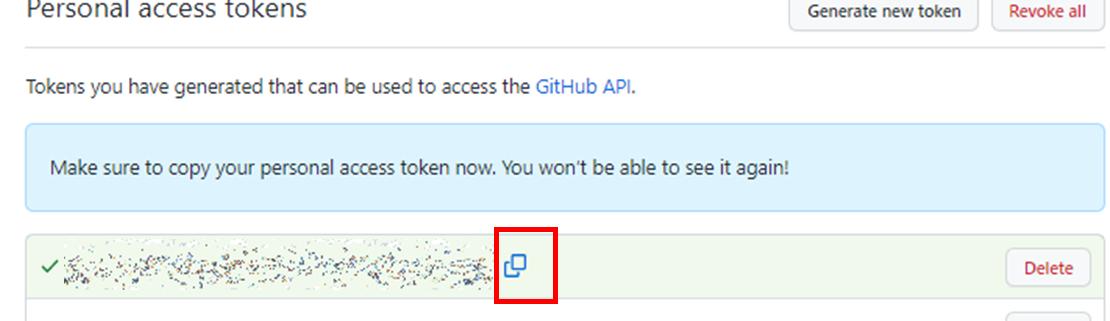
7. 이 페이지에 다시 들어오면 아래와 같이 변경 됩니다.

8. 이제 소스트리에서 기존에 사용하던 repo의 패스워드를 초기화 해주어야 합니다.
- 아래 파일을 열어 깃허브에 해당하는 계정과 패스워드를 지워줍니다.
위치 : C:\Users\goni\AppData\Local\Atlassian\SourceTree
파일명 : passwd
내용 :
깃허브계정@github.com
암호화된 기존 패스워드
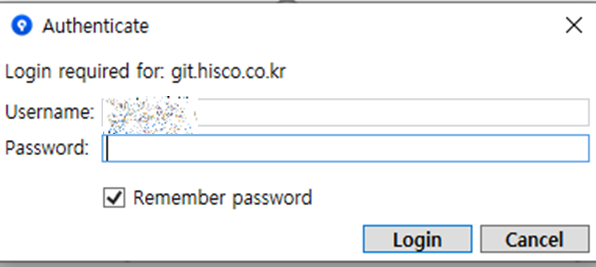
9. 소스트리에서 다시 Push를 하게 되면 아래와 같이 인증창이 다시 뜨는데, 이 때 Password에 새로 발급받은 토큰을 붙여넣기 하면 정상적으로 인증이 됩니다.
이상입니다.!